How to Glue Marble
There are a number of gotchas to look out for if you you are gluing marble. Getting a good bond and an invisible seam are two of the top goals when working with adhesives on marble. To reach those goals, you need a high quality glue that will bond well and one that will not yellow over time. Of course, there is a proper way to bond marble and in this article we are going to consider some basics for gluing marble.
The process for bonding marble is as follows:
Gluing Marble
- Select a quality adhesive to glue your marble.
- Be sure that the surfaces to be glued are free of any and all dust.
- Dry fit the pieces before gluing.
- Apply the marble glue to the pieces.
- Work at a fast pace.
- Clamp the pieces of marble together.
- Let the adhesive cure for the proper length of time.
- Remove the any excess glue form the surface.
Those are the simple steps listed in order. Now let's take a look at each step in greater detail and explain why each step is necessary.
Selecting A Proper Marble Adhesive
There are a number of stone adhesives and cartridge glues available for working with stone. A key to getting a good bond on marble is selecting an adhesive that is designed to work with the type of stone stone you are bonding. While it is true that many adhesives will glue marble, there are some glues that have benefits over others. Let's look at one aspect of bonding marble that you might need to be aware of.
If you are gluing a light colored marble, one thing that you will want to take into consideration is whether the glue you use will create an invisible seam. When fabricating light colored marble, some adhesives leave a noticeable line at the point where the two pieces of stone bond. Because adhesives can be absorbed into the pores of the stone, the stone can be darkened. Additionally, some adhesives turn yellow when exposed to UV rays. The solution to these issues is to select a cartridge glue that does not darken the stone. One glue cartridge product that is designed to give you a great bond on light colored marble is Glaxs. Not only does high quality adhesive give you a great bond, but it won't yellow and is available in a large range of colors. Here are some that would work well for light colored marble slabs:
Each stone may require a different color of adhesive so be sure you match up the stone you are gluing to the proper white. Since the shades of white vary, you might want to make use of a color chart (usually provided by the glue manufacturer) to help you identify the exact white that you need. Once you have selected the proper adhesive and color, you are read for the next step.
Cleaning the Marble Surfaces for Bonding
After you have selected the correct adhesive and you have the proper color of glue, you can begin to prepare the marble piece for gluing. This preparation phase has a series of step itself. The steps for preparing marble to be glued are:
- Dip a soft cloth in denatured alcohol and wipe the marble with it.
- Rinse the marble using clean water.
- Use acetone on the surface to remove any coating that may be on the marble.
- Wipe off any excess acetone and let dry.
Now that you have cleaned the marble of any dirt or dust that could impede the bonding, you are ready to proceed to the next step in the process.

Dry Fit the Pieces Before Gluing
Since gluing marble is a permanent thing, it is critical that you get it right the first time. Because of this, it is best if you put your pieces together without any glue (a.k.a. dry fitting) so you can see if there are any issues that you might want to correct before applying the glue and bonding the stone pieces.
You won't want to wait until you have the glue on the marble to begin checking to see if things line up correctly because stone glue begins curing quickly and can be extremely difficult remove once it is on the stone. Hence, be sure your pieces line up the way you want them to before you begin gluing them together. Once you verify that the pieces are just how you want them, it is time to move on to the bonding step.
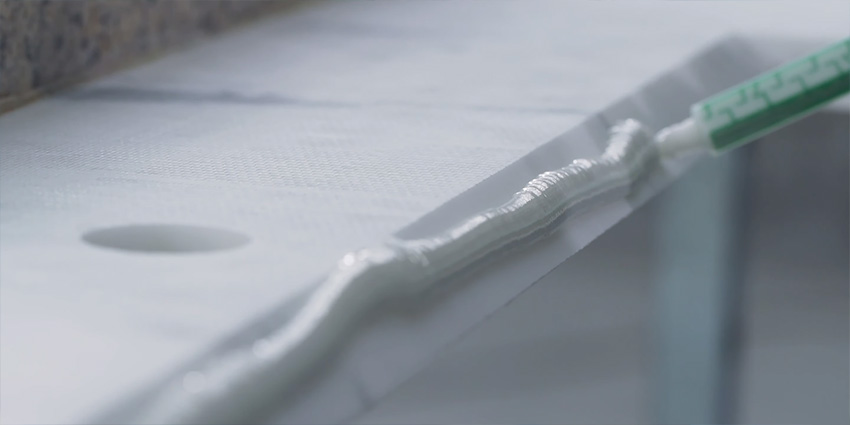
Gluing the Marble
The strongest marble glues will dry quickly and you won't necessarily have enough time to coast through the gluing process. You will want to be sure that you know exactly how you plan to attack the task. Cartridge glue is great for this since it is easily dispensed and can be run right where you want the glue to go. Cartridges are also pre-dosed so you do not have to mix up a batch of glue only to waste a portion of it after it has been sitting without being used.
Once you have your adhesive in place you should clamp the pieces into position and allow them to site and cure. While the glue is still wet, wipe any excess adhesive off of the marble so your clean up will be easier later. Another way to easily remove excess marble glue is by de-roping. A razor blade makes an excellent tool for de-roping during the gluing of marble.
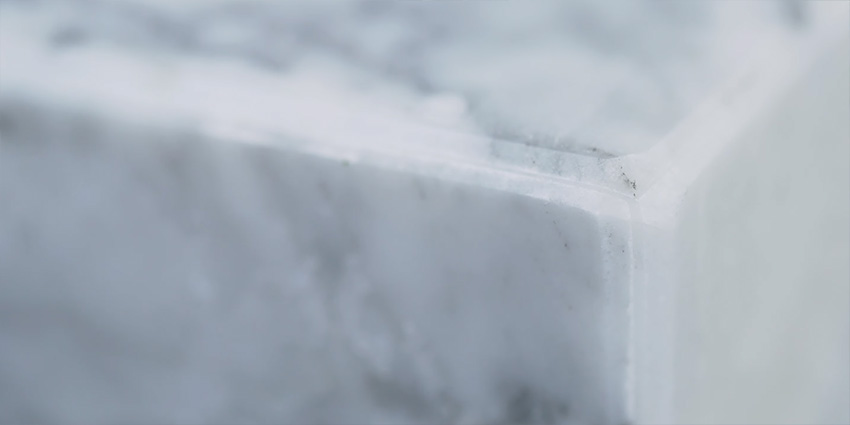
Cleaning Up the Surface After Glue Cures
After allowing the marble to sit clamped for the necessary time (often times, 24 hours is the recommended time), remove any unwanted material from the edges of the glued marble. In the above image, you can see just how clean the edge can be when you follow each step of this process for gluing marble.
In conclusion, gluing marble is not difficult. However, there are some steps that are critical to getting a great result. By selecting a high quality cartridge glue, cleaning your stone properly, and carefully setting the joint, your marble gluing job will turn out with excellent results.
|

